TissUUmaps is an open-source browser-based tool for fast visualization and exploration of millions of data points overlaying a tissue sample. SciLifeLab Serve allows sharing of spatial omics data combined with a running instance of TissUUmaps as a tool allowing visitors to explore the data inside their web-browser window.
By creating a TissUUmaps app on SciLifeLab Serve and uploading their dataset researchers can obtain a unique URL that they can then share with colleagues or in their scientific articles to allow others to explore the data.
Introduction
SciLifeLab Serve allows hosting of TissUUmaps apps free of charge to researchers in life sciences working at a Swedish research institution as well as their collaborators abroad. All TissUUmaps apps can be made publicly available through a URL in the form of x.serve.scilifelab.se.
Step-by-step guide
Step 1. Prepare your dataset
Begin by loading your data into a local instance of TissUUmaps. Refer to the TissUUmaps documentation for detailed instructions on installing and running TissUUmaps locally. Ensure that you are using the latest release of TissUUmaps to ensure optimal compatibility with the Serve TissUUmaps instance.
Once your data is loaded locally in the TissUUmaps application, provide a title and a description in the project settings tab of the TissUUmaps menu.
Save your TissUUmaps project as .tmap files, ensuring that all dependent files (images, .csv files, .h5ad files, .json files) are located within the .tmap file directory or sub-directory.
In case you want to host multiple project files in the same instance of Serve TissUUmaps, you can create multiple .tmap files in the same directory.
Note: you shouldn't export your TissUUmaps project to static, but save it as a .tmap file. The Serve TissUUmaps instance will load the .tmap file and render the project in the browser.
Step 2. Create a user account on SciLifeLab Serve
If you do not already have a user account on SciLifeLab Serve, create an account.
Step 3. Create a project
Every app and model has to be located within a project. Projects that you have created/been granted access to can be found under My projects page.
You need to be logged in to create a project. To create a project, click on the corresponding button on that page. Choose Default project template. The name and description of the project are visible only to you and those who you grant access to the project. Once the project is created, you will be taken to the project dashboard where you can create different types of apps.
Note that each project on SciLifeLab Serve is allowed to have a single TissUUmaps app. This means that if you would like to share multiple TissUUmaps apps you will need to create a separate project for each of these.
Step 4. Upload your data to the project volume
Each project on SciLifeLab Serve has a persistent volume attached to it. A persistent volume is essentially a folder where folders and files (for example, data files) can be stored and accessed. You will need to upload your data that the TissUUmaps app should display into this persistent volume.
Please follow this guide on file management functionality to activate file management. Navigate to your file manager and create a folder project-vol/tissuumaps-shared/. Upload all your datasets into this folder. Keep the same directory structure as the one on your local machine.
By default your TissUUmaps app will display the project called project.tmap. If there is no such project the user will be prompted to choose one of the .tmap files in the project-vol/tissuumaps-shared/ folder.
By default, each project on SciLifeLab Serve currently gets a persistent volume with 1 GB of storage. This can be increased for projects that contain a TissUUmaps app, send us an email to serve@scilifelab.se. In your email please provide the name of the project where you would like to upload a larger dataset and the size of this dataset.
Step 5. Create a TissUUmaps app
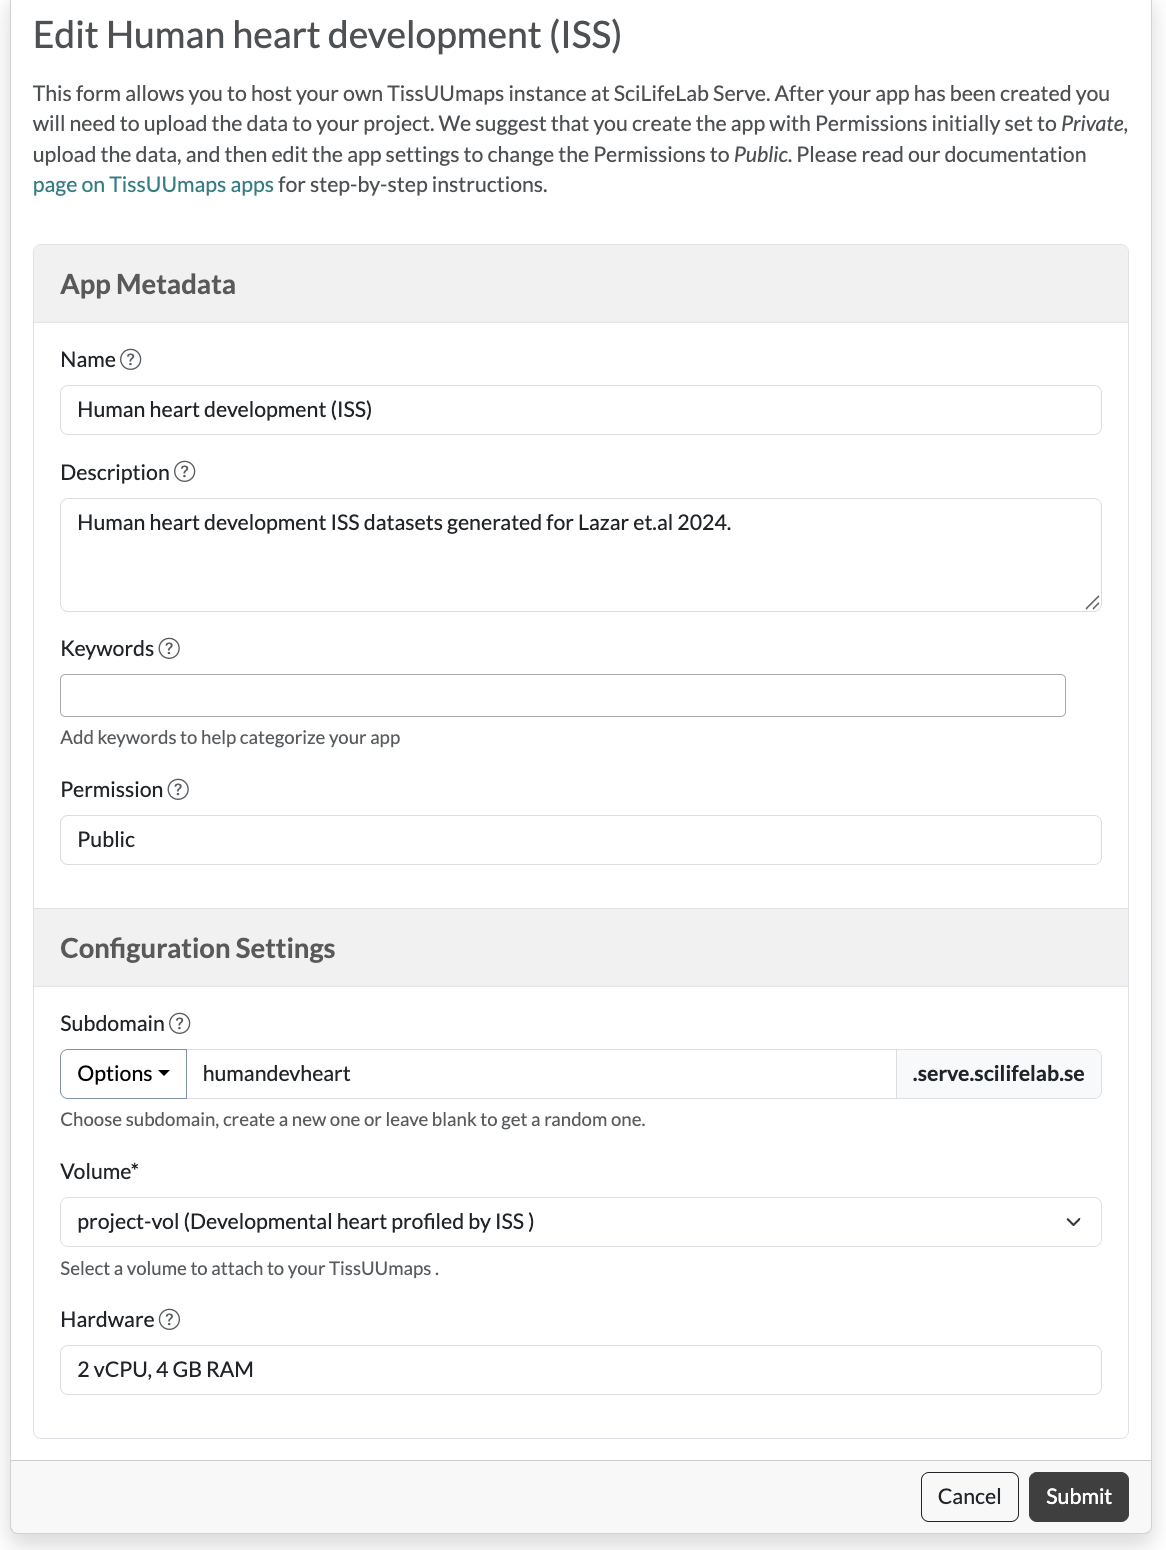
In order to start a TissUUmaps app click the Create button on the TissUUmaps App card. Then enter the following information in the form:
- Name: Name of your app that will be displayed on the Public apps page.
- Description: Provide a description of the dataset, will also be displayed on the Public apps page. This functions as an abstract describing your dataset.
- Keywords: Provide a few keywords describing your dataset.
- Subdomain: This is the subdomain that the deployed app will be available at (e.g., a subdomain of 'my-cool-app' would mean that the app will be available at my-cool-app.serve.scilifelab.se). If no subdomain name is entered, a random name will be generated by default. By typing in the input box you can specify the custom subdomain name of your choice.
- Permissions: The permissions for the project. There are four levels of permissions for an app: 1. Private: The app can only be accessed by the user that created the app (sign in required). Please note that we only allow the permissions to be set to Private temporarily, while you are developing the app. Eventually each app should be published publicly. 2. Project: All members of the project where the app is located will be able to access the app (sign in required). Please note that we only allow the permissions to be set to Project temporarily, while you are developing the app. Eventually each app should be published publicly. 3. Link: Anyone with the URL can access the app but this URL will not be publicly listed anywhere by us (this option is best in case you want to share the app with certain people but not with everyone yet). 4. Public: Anyone with the URL can access the app and the app will be displayed under Public apps page.
- Persistent volume: This is the volume to which you will be uploading data. Each project on SciLifeLab Serve by default has only one volume called 'project-vol', make sure that is selected.
Below is an example of what the settings of your app could look like.
After you create your app, you will be taken to the Project overview again, and should see your app in the list of deployed apps. The state will initially show as 'Pending' (shown in an orange label), but should change to 'Running' (shown in a green label). If you earlier uploaded your data into a correct folder at this point your TissUUmaps app should be displaying your dataset. If you chose "Link" or "Public" permissions, the app can now be accessed by anyone opening the app URL. "Public" apps are also displayed under the "Apps" page on SciLifeLab Serve.
To update data displayed by your TissUUmaps app you can simply update the data in the folder project-vol/tissuumaps-shared/. To update the name, description, or subdomain of your TissUUmaps app go the app settings page (click on the "Settings" link). To delete the app, press the "Delete" link next to the "Settings" link.
Frequently Asked Questions
I am stuck while following the guide. Can I get help?
Yes, feel free to get in touch with us (serve@scilifelab.se). Please describe at what step you got stuck, what you were trying to do, and what output you saw in your email so that we can best help you.
Can my app be hosted at a top-level domain, such as www.example.org?
Yes, it is possible. Your app will then be available at both x.serve.scilifelab.se and your own example.org. To do this, you will need to purchase a domain name yourself and set up DNS settings that you will get from us. Get in touch with us (serve@scilifelab.se) so that we can arrange this for you.
What version of TissUUmaps is used on SciLifeLab Serve?
SciLifeLab Serve always uses the most recent publicly available version of TissUUmaps 3.
Can I keep my app private while my article/conference submission is under review?
Yes, it is possible to publish an app in such a way that only those with a URL can open it. To do that, choose "Link" option in the Permissions field of the app settings. In this case those who you share the link with (for example, reviewers of your article) will be able to open it but not anyone else.
Can I get a DOI (Digital Object Identifier) for my app?
In case of TissUUmaps the important aspect is not the DOI but the dataset itself. We, therefore, recommend depositing the dataset itself to a data repository that will provide a DOI. Having said that, if you still wish to obtain a DOI for your TissUUmaps application, let us know, and we can create one for you (serve@scilifelab.se).
Can I host a private app for my research group?
No, each app on SciLifeLab Serve needs to be made public eventually. The apps can only stay private while you are still developing it or while it is under peer review.
How do I update or delete my app after it has been published?
Please find the answer in the text of this page.
Can I see how many users are accessing my application?
At the moment we do not track such statistics.
Can I embed my app on another website using an inline frame (iframe)?
Yes, you can do that. We do not restrict embedding of the apps hosted on SciLifeLab Serve into other websites.
Is there a size limit for a file I want to upload when using the app?
Yes, for TissUUmaps apps, the upload size limit is 100MB. If your project requires uploading files with larger size, contact us at serve@scilifelab.se
The SciLifeLab Serve user guide is powered by django-wiki, an open source application under the GPLv3 license. Let knowledge be the cure.